ADA Hotel Room Signs: Tactile, Braille and Buyer Checklist
Written by: AeroSignage GlobalReviewed by: AeroSignage Editorial TeamPublished:Updated:
Use a sign-function schedule, a dimensioned tactile drawing and a location plan to order hotel identification signs. This U.S.-focused guide connects official ADA references with the drawing, sample and installation decisions a procurement team needs to resolve.
Do hotel room number signs need tactile text and braille?
Under the U.S. ADA Standards, provided signs identifying permanent rooms, including hotel room numbers, generally need visual and tactile information; raised text is duplicated in braille. Directional signs follow a different rule. Classify each sign before selecting its artwork. Then obtain project approval for the content, construction and installation drawing. A decorative number or an attractive sample alone does not establish compliance.
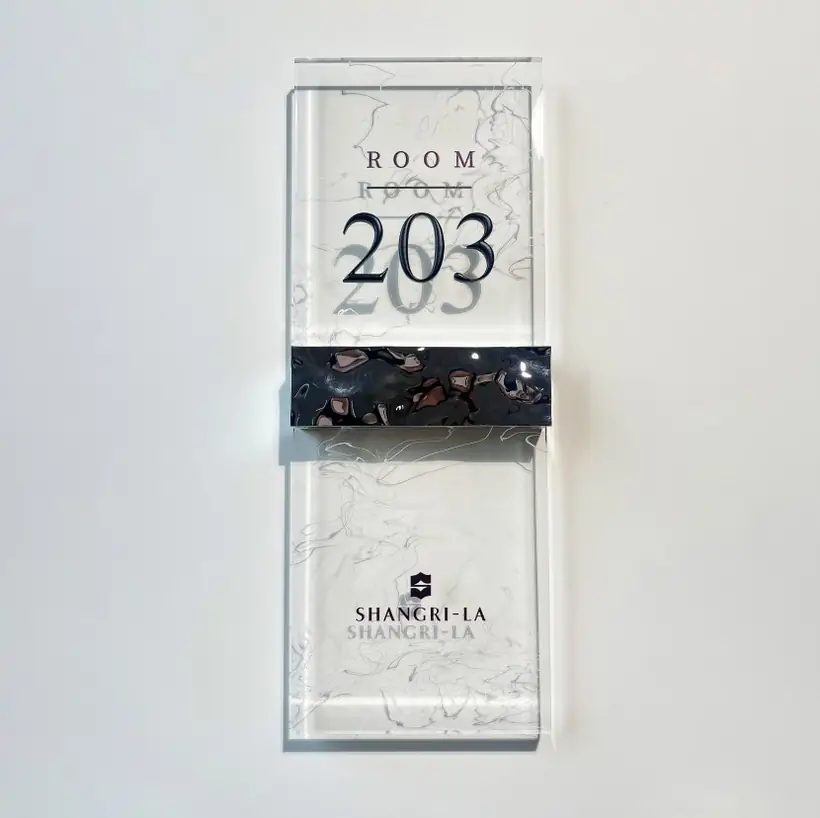
Use decorative room-number photos as design references, then confirm tactile, contrast, mounting, and local accessibility requirements separately.
1. Separate decorative room numbers from compliance review
Create one row for each sign location, even when several signs share the same finish. Record what the sign does, its exact message, location code, room or area, quantity and the person responsible for approval. A guest-room number, an arrow pointing toward rooms and a hotel logo should not enter production under one undifferentiated label such as ADA sign.
The U.S. Access Board distinguishes permanent room identification from directional or informational content. Mixed-content signs need each element reviewed. Use the table to organize the schedule; the linked guidance explains the requirements and exceptions that the project reviewer must apply.
Sign-function screening for a U.S. hotel schedule
Sign function
ADA reference to review
Procurement action
Permanent room identification, such as guest-room numbers or restroom labels
Section 216.2: visual and tactile requirements
Give this sign type its own approved drawing and message record.
Arrows and information directing guests to interior rooms or facilities
Section 216.3: visual-character requirements
Separate the directional artwork from the permanent-room plaque.
Required exit-door identification
Section 216.4.1: tactile door labels
Coordinate with the project life-safety schedule.
Logo, occupant name or other mixed content
Section 216.1 exceptions and the role of each element
Have the reviewer classify the content instead of applying one rule to the whole layout.
2. Decide whether the room sign needs tactile characters, braille, or a paired design
The ADA technical provisions specify at least 1/32 inch (0.8 mm) of character relief. The usual raised-character height range is 5/8 to 2 inches (16 to 51 mm), measured using the uppercase I; a separate visual/tactile arrangement has an exception. Braille is contracted Grade 2 with rounded dots. These are selected checkpoints, not the full specification: proportions, spacing, dot dimensions and other provisions still apply.
For production review, supply a drawing showing the approved font, character measurements, braille layout, border clearance, materials, finish zones and fixing detail. Attach the reviewed text and braille record to the same revision. A visual effect described as raised, embossed or carved does not identify the measurements the workshop must reproduce.
Choose a representative sample that includes the difficult details in the schedule: a long room name, the chosen numeral shapes, a border or a mixed-material joint. Record which dimensions and surface details the buyer will check and how any change will be approved before the remaining signs are released.
3. Use decorative manufacturing routes without hiding accessibility constraints
Section 703.1 allows visual and tactile information on one sign or on two separate signs. Section 703.5.1 requires non-glare visual characters and backgrounds with light-on-dark or dark-on-light contrast. A polished decorative border is therefore a separate design decision from the approved reading surface.
Start the finish discussion with the actual corridor: wall color, door finish, light direction, cleaning products and the guest approach. Identify which parts of a layered or CNC-carved design carry required information and which are decorative. Ask for a sample under the intended lighting; a studio photograph cannot settle every finish or glare question.
Use one finish reference and one approval record across the room family. If a suite plaque needs a different surface or layout, give it a separate type code and approve that variant explicitly. Do not let a last-minute color substitution silently alter an already reviewed identification drawing.
4. What to send when ADA or tactile review may apply
Section 703.4.1 measures tactile mounting height from character baselines: the lowest is at least 48 inches and the highest no more than 60 inches above the finished floor. This is not a plaque-centerline rule. Section 703.4.2 covers location, door swing and approach space, including exceptions.
The procurement package should include an elevation with the floor reference, sign outline, text baselines, adjacent door and proposed fixing positions. Add wall photographs and note trim, glazing, switches or other constraints. Ask the project reviewer and installer to resolve the position before the workshop places holes, studs or an adhesive backer.
Separate fabrication approval from site acceptance. AeroSignage reviews the physical sign and manufacturing route against the agreed documents. The project team approves applicable requirements and the installation plan; the installer checks the finished location. Confirm any inspection or documentary requirement in the order rather than assuming a sample photograph covers it.
5. How to keep premium design and responsible specification together
Before release, reconcile the sign schedule with the approved artwork. Check every room number, room name, language, type code, quantity and packing group. Keep the approved content revision with the drawing revision, and list any locations still awaiting review separately from the signs released for production.
The RFQ can begin with a marked schedule and reference images while the design is developing. Identify unresolved requirements and the responsible reviewer so a preliminary production discussion is not mistaken for approval. For the final order, supply the approved drawings, content record, finish reference, mounting plan, sample acceptance record and floor-by-floor packing list.
Release record
Buyer or project reviewer confirms
Manufacturing handoff
Sign-function schedule
Which requirements apply at each location
Approved type, message, quantity and location code
Content record
Exact text, braille and language approval
One controlled message revision
Construction drawing
Dimensions, visual treatment and specified standard
Materials, tactile details, finish zones and fixings
Site plan
Installation position and local review
Sign locations coordinated with the fixing detail
Sample and batch release
Accepted sample and approved changes
Matched artwork, schedule, sample reference and packing groups
From selection to an approved sample
Keep the specification, sample and quotation in agreement
Record the actual base material, finish reference, dimensions, mounting surface and approval owner. Use the sample checklist to note what is accepted and what still needs confirmation before the production release.
Classify permanent-room, directional and other sign functions before designing one sign family.
Tie tactile dimensions, braille content, material, finish and mounting to an approved drawing revision.
Check a representative sample against documented acceptance points, not appearance alone.
Coordinate the installation drawing and local approval before freezing fixings and batch artwork.
Sources and review scope
Supplier-specific statements use clearly identified first-party AeroSignage materials. Accessibility guidance links to the official U.S. sources below.
Local codes, accessibility requirements, engineering details, and order-specific claims must be confirmed for the destination market before production.
FAQ
Can I add braille to a decorative room plaque and call it ADA compliant?
Adding braille alone is insufficient. The complete sign design and installation need review for the applicable character, braille, visual and location requirements. Send the approved drawing and sign function with the RFQ.
Does every arrow sign need braille?
Do not treat an arrow sign as the same type of sign as a permanent-room label. Classify it using the official directional and informational guidance, then record the project-approved requirements on its drawing.
Who approves the wording and braille before production?
Name the buyer or project reviewer responsible for approving the message and braille record. AeroSignage reviews how the agreed design can be manufactured; content approval should be recorded before the batch is released.
Can AeroSignage provide a blanket ADA certificate for a hotel?
No blanket project certification is offered here. Manufacturing review follows the buyer-approved specification, while the project jurisdiction, installation and final compliance determination remain with the responsible project professionals.
Hotel Room Numbers
Continue with the product pillar or the most closely related guides for sizing, materials, lighting, accessibility notes, cost, and quote preparation.