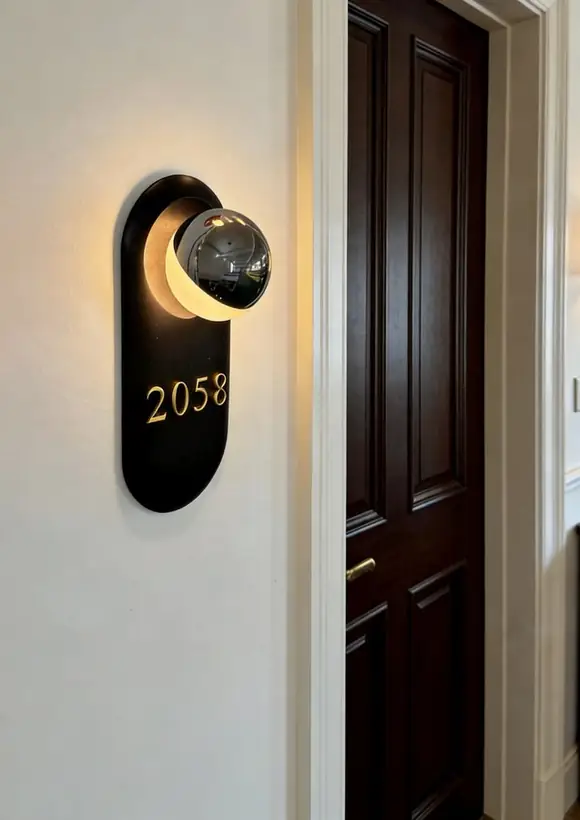
Lighted vs Non-Lighted Hotel Room Signs: Cost and Installation
Written by: AeroSignage GlobalReviewed by: AeroSignage Editorial TeamPublished:Updated:
Choose illuminated room signs only after coordinating power, access and maintenance. Compare the complete installed scope with non-lighted plaques, then use a representative sample to confirm the corridor appearance.
Should a hotel choose lighted or non-lighted room number signs?
Choose lighted room signs when the intended effect justifies a coordinated power supply, accessible components and ongoing maintenance. Choose non-lighted plaques when the corridor lighting already provides a readable sign and simpler installation is valuable. Compare sign fabrication, wiring, drivers, access work, installation and replacement together. A mixed schedule can reserve illumination for selected suites or feature locations while keeping a consistent finish across the property.
Lighted room numbers can create a premium corridor effect, but the RFQ must also cover wiring, testing, maintenance, and installation.
1. Use lighting when the corridor design supports it
Survey the location before comparing product photographs. Record the normal and night-time corridor lighting, approach angle, wall texture, door finish and available depth. A halo behind a number depends on the mounting surface and separation from it; a backlit acrylic face has a different appearance. Identify the effect you want before asking for an illuminated quotation.
For a renovation, find out whether power is already available at the proposed position and whether finishes can be opened for wiring. Include hotel engineering or the installer early. A design that requires opening a completed wall may have a very different installed cost from a non-lighted plaque using the existing lighting.
Specify the sign input and the building supply as different fields. For example, a proposed 12 V DC sign is not a description of the building mains supply. Ask the electrical designer or installer to confirm the selected equipment, power architecture, circuit arrangement, cable route and access provisions. Do not select a driver merely because its voltage label appears to match the sign.
Agree whether a driver is included with each sign, supplied separately, or provided locally. Identify the accessible location for that equipment, the connector or termination interface and how the sign can be removed for service. Cable lengths, routing and any shared power arrangement need project-specific review; the RFQ should flag what remains undecided.
Lighting handoff record to attach to the quotation request
Item
Information to agree
Who needs to confirm it
Sign assembly
Dimensions, lighting effect, input specification and connection point
Manufacturer with the buyer-approved design
Driver or power supply
Included or excluded, selected equipment and accessible location
Manufacturer and project electrical team
Site wiring and controls
Cable route, switching or dimming requirements and installation scope
Project electrical designer or installer
Service access
How the sign and equipment are reached and replaced
Hotel engineering and installer
Required documentation
Destination-specific evaluation, labeling and approval scope
Buyer and responsible project reviewer before order acceptance
2. Use non-lighted plaques when clarity, scale, and maintenance matter more
Compare non-lighted plaques when the existing corridor light makes the room number readable and the project benefits from avoiding sign-specific wiring. CNC relief, separate digits, layered acrylic, ceramic and metal finishes can create depth without electrical components. The material and finish still need review against the actual location.
Use a full-size layout to check the longest room number, approach angle and available wall area. Review contrast and surface appearance under the normal and night-time corridor lighting. For repeated rooms, keep one approved finish reference and a documented fixing detail so replacement requests can identify the same sign family.
The simpler construction does not remove installation or accessibility questions. Check the receiving surface, approved sign position and any required tactile design before selecting adhesive, studs, screws or another fixing route. Compare the options below against the actual site condition.
A practical first decision before selecting a room-sign style
Project condition
Route to compare first
What to establish
Existing corridor with finished walls and no power at sign positions
Non-lighted relief or layered plaque
Readability under actual corridor lighting and a suitable fixing method
New fit-out with coordinated wiring and accessible equipment
Lighted and non-lighted alternatives
Appearance benefit, equipment locations and complete installed scope
Feature suites within a larger room schedule
A mixed illuminated and non-lighted family
Shared finish and numeral style, with separate electrical drawings for lit types
Door-mounted sign with uncertain cable routing
Non-lighted or a revised wall-mounted design
Door constraints and an installer-approved mounting and power arrangement
3. Compare total project cost, not only unit price
Request two alternatives against the same room list, plaque dimensions, finish target, mounting location and packing plan. Ask each quotation to identify sign fabrication, samples, drivers where applicable, mounting hardware, packing and freight separately. Keep local wiring, wall access and installation allowances visible in the project budget even when they are outside the sign supplier’s quotation.
For the lighted option, include access and replacement planning: what component is replaced, who performs the work, whether the sign face can be reused and which approved part reference is retained. For the non-lighted option, review cleaning, fixing replacement and finish matching on later orders. Do not infer a lifetime, warranty or service interval from the choice of LED or material alone.
A useful comparison is the total initial supplied-and-installed scope plus an explicitly agreed maintenance allowance. There is no defensible universal percentage premium for lighting without the actual construction and site inputs. Ask for quote assumptions rather than treating a generic online price range as a hotel project budget.
UL Solutions distinguishes electric-sign certification from sign-component requirements, including UL 48 for electric signs and UL 879 for components. Its UL 48 scope includes electrically illuminated signs regardless of voltage. A low-voltage proposal or a component specification therefore should not be presented as proof that the complete installed sign has the approvals your project requires.
For a U.S. order, have the project team identify the relevant sign and installation requirements before the production route is accepted. For another destination, provide that market and its required documentation instead of copying a U.S. checklist. Ask which documents cover the proposed construction, model and use environment. AeroSignage product images and this guide do not establish certification for an order.
Keep decorative illumination separate from the accessibility and life-safety review. If the sign also serves required room identification, maintain the approved content and construction requirements. An attractive lit number is not a substitute for checking the required sign function.
A hotel can use a repeated non-lighted construction for standard rooms and reserve illumination for suites or selected feature locations. Maintain shared numeral shapes, finish references and proportions, then identify the different constructions as separate sign types. The lighting choice should follow a defined location need rather than requiring every room to use the most complex build.
Review one sample on the intended wall finish, or a close physical mock-up, using the proposed power equipment and corridor lighting. Compare light color, apparent brightness, visible dots or hotspots, edge leakage, shadows, contrast and the appearance with the sign switched off. Record the accepted configuration and any requested change alongside the finish sample.
Check the maintenance sequence as well as the appearance: how the face releases, where connections are reached and whether removing a sign disturbs the wall. Agree the order-specific functional checks and records before shipment; do not assume a photograph of a glowing sign answers every test or inspection question.
List the sign code, exact number or message, quantity, size, finish, lighting type, mounting location and packing group. For illuminated types, attach the agreed electrical handoff and sample record. Mark an unconfirmed input as pending instead of allowing the workshop and installer to make different assumptions.
AeroSignage can review the proposed room-sign construction from this package. Start with a photographed style or your own drawing, identify which parts of the installation are already resolved, and ask for the remaining quotation assumptions in writing.
Quotation line
Ask the sign supplier to identify
Separate project allowance
Sign fabrication
Quantity, finish, lighting construction and hardware
Any survey or local design coordination
Power equipment
Driver supply and connection scope, if included
Locally supplied equipment and electrical design
Installation
Mounting interfaces and supplied instructions
Wiring, access work, making good and site labor
Approval and documentation
Order-specific evidence available for the proposed construction
Required local review or inspection
Replacement planning
Agreed component or sign references and quoted spare options
Access labor and hotel maintenance arrangements
From selection to an approved sample
Keep the specification, sample and quotation in agreement
Record the actual base material, finish reference, dimensions, mounting surface and approval owner. Use the sample checklist to note what is accepted and what still needs confirmation before the production release.
Local codes, accessibility requirements, engineering details, and order-specific claims must be confirmed for the destination market before production.
FAQ
How much more do lighted hotel room signs cost?
The difference depends on construction, quantity, drivers, wiring, site access and installation. Request lighted and non-lighted alternatives against the same room list and finish, with electrical and local installation costs shown separately.
Does a 12 V sign connect directly to the hotel’s building supply?
The proposed sign input is not the building-supply specification. The selected driver, supply arrangement and connection must be coordinated with the manufacturer and the project electrical team before installation.
Can drivers be hidden behind the signs?
That depends on the selected equipment, sign construction, space and approved installation. Confirm the location and service access on the drawings before ordering; hiding equipment without a maintenance plan can complicate replacement.
Can standard rooms be non-lighted while suites use lighting?
Yes, a mixed design can share typography, geometry and finishes. Give each construction its own sign-type code and sample approval so the electrical scope is limited to the intended locations.
Hotel Room Numbers
Continue with the product pillar or the most closely related guides for sizing, materials, lighting, accessibility notes, cost, and quote preparation.